How to Install Debian 12 in VirtualBox (Windows 11)
In this post, I will explain how to easily install Debian 12 in VirtualBox running on Windows 11.
Remember that Windows 11 has the ability to run WSL2 (Windows Subsystem for Linux), which is much easier to setup and work with, but sometimes setting up a virtual machine on our own can be useful.
Download and install VirtualBox
First step is to download and install VirtualBox, go HERE and download and install the latest version of VirtualBox
Download Debian ISO
Go HERE and download the amd64 version of the iso
Installing Debian in VirtualBox
Step 1 : Configuring the new VM in VB
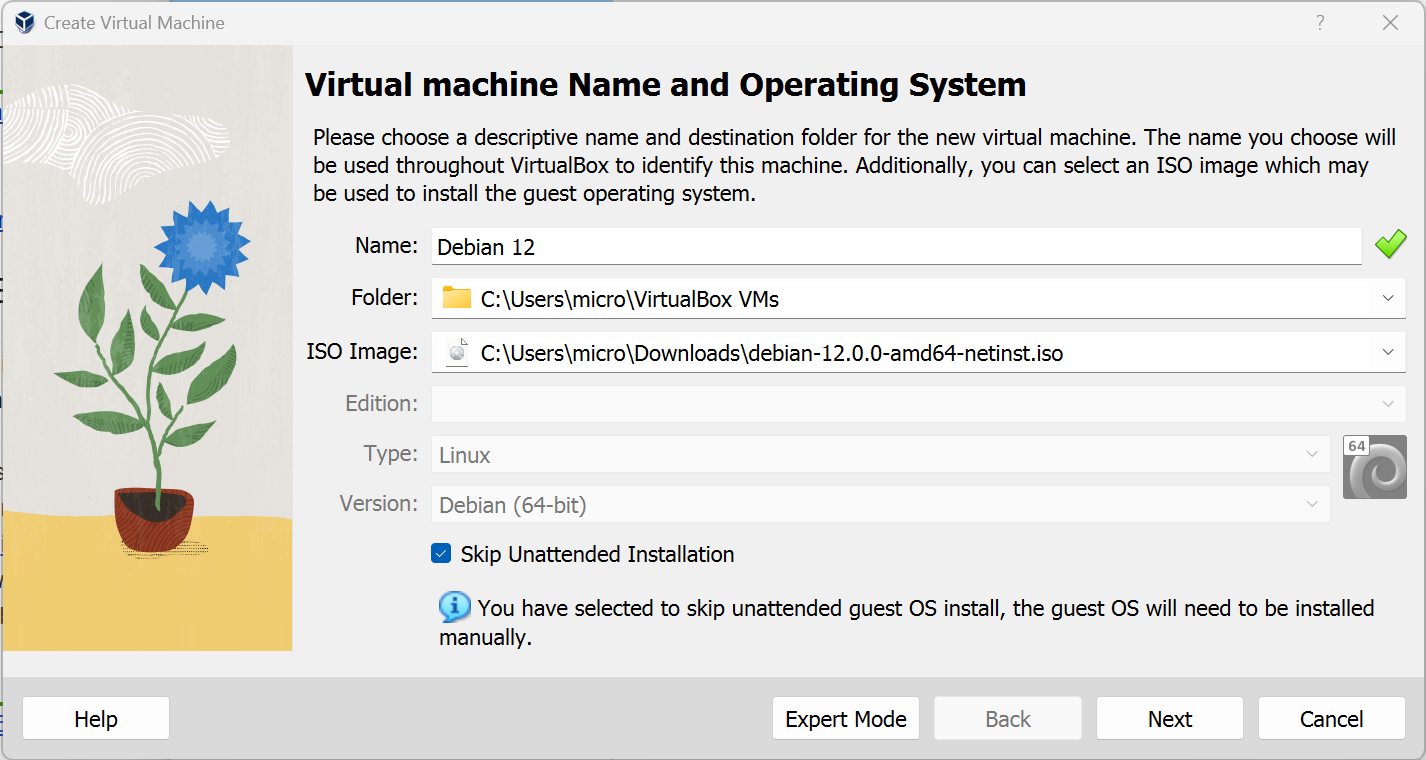
Open virtualbox, click New, it will open up a window to configure your new vm information.
- Name : Choose a name, I chose
Debian 12 - Folder : You can leave it at the default
- ISO Image : Browse to the debian ISO we just downloaded
- Skip unattended installation : Uncheck this, so as to control things like installing a desktop environment
Step 2 : Choose system resources, Virtual hard disk
Here we choose how much CPU and ram to give to the new VM. This entirely depends on what you are planning to do with the VM. In my case, I chose :
- 2048MB of ram
- 2 cpu cores
Next, under Virtual Hard Disk, choose Create a virtual hard disk now.
Give enough disk space as you would see fit. I chose to give 10GB, click next and Finish
Step 3 : Installing Debian 12
Back in VirtualBox, click on the VM we just created and click Start. This should boot up the iso and you will be presented with a boot menu. Choose Graphical installer
- Choose your language, location and keyboard
- Hostname : choose a preferred hostname,
debianshould be good if you are unsure - Domain name : Leave it empty
- Root password : Set a root user password that you will remember
- Full name for the new user : Choose a new name for a new user that will be created
- User password : Choose a password for the new user
- Choose your timezone
- Under "Partition disks", choose
use entire disk. Don't worry about this, this is only using the virtual disk we created for this virtual machine
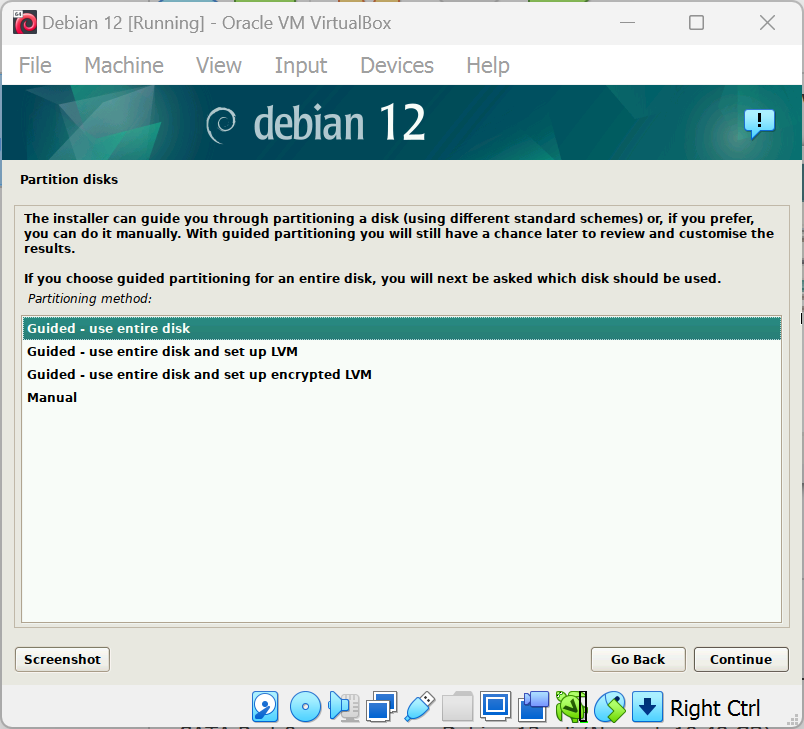
- Click continue
- In the next screen, choose
All files in one partition - And choose
Finish partitioning and write changes to disk - Choose
yesand click next Scan extra installation media: ChooseNoConfigure the package manager: Choose your country or a country close to you.- Choose the default address
- Skip the
HTTP Proxy information(leave it blank)
Step 3.2 Choosing a desktop environment
This part is completely up to you. If you want your new debian virtual machine to have a graphical UI like Gnome, or KDE, you can choose that one here.

If you want a desktop environment, make sure you check two boxes:
Debian desktop environment- An environment of your choice. Xfce, Mate, LXDE are very lightweight and I would recommend any of them if you want a desktop environment
I choose not to install any desktop environment because I will be using ssh to connect to this VM. You can see that I have chosen SSH server for that reason.
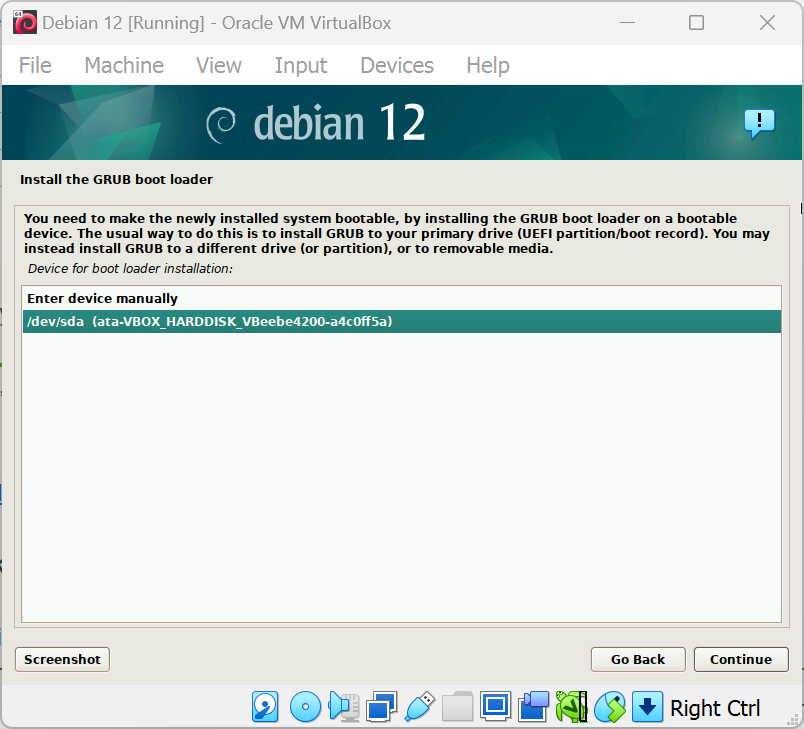
Step 3.3 Installing Grub Bootloader
Choose Yes in the Install GRUB bootloader screen and choose the device as shown below.
Reboot and enjoy your new Debian 12 installation