How to create a 4x6 Passport Photo Grid for free
If you want to create a 4x6 passport photo grid (6 photos) so that you can get it printed easily and cheaply, you can do so using free tools and your phone camera. It is a lot easier than you think.
Step 1 : Take the photograph using your phone camera
As long as your mobile phone was released in the past few years, your phone is more than capable of taking good picture to be used as a passport photograph
Step 2 : Transfer the photo to your computer
You can use whatever method is convenient to you, but we need to ensure that the full resolution image is transferred to the computer
Step 3 : Install Gimp
Gimp (Gnu Image Manipulation Program) is a free and open source tool that can help us with creating the photo grid. It is an amazing (and did I say free?) replacement for Photoshop.
Go to https://www.gimp.org/downloads/ and download and install the appropriate file for your operating system
Step 4 : Cropping the Photo using Gimp
At this point you have Gimp installed and you have your photograph in your computer. But your photograph is probably not cropped to the size we require.
Let's do that first.
- Open Gimp, and
File->Openand select your photo and open it. - To crop the image, select the
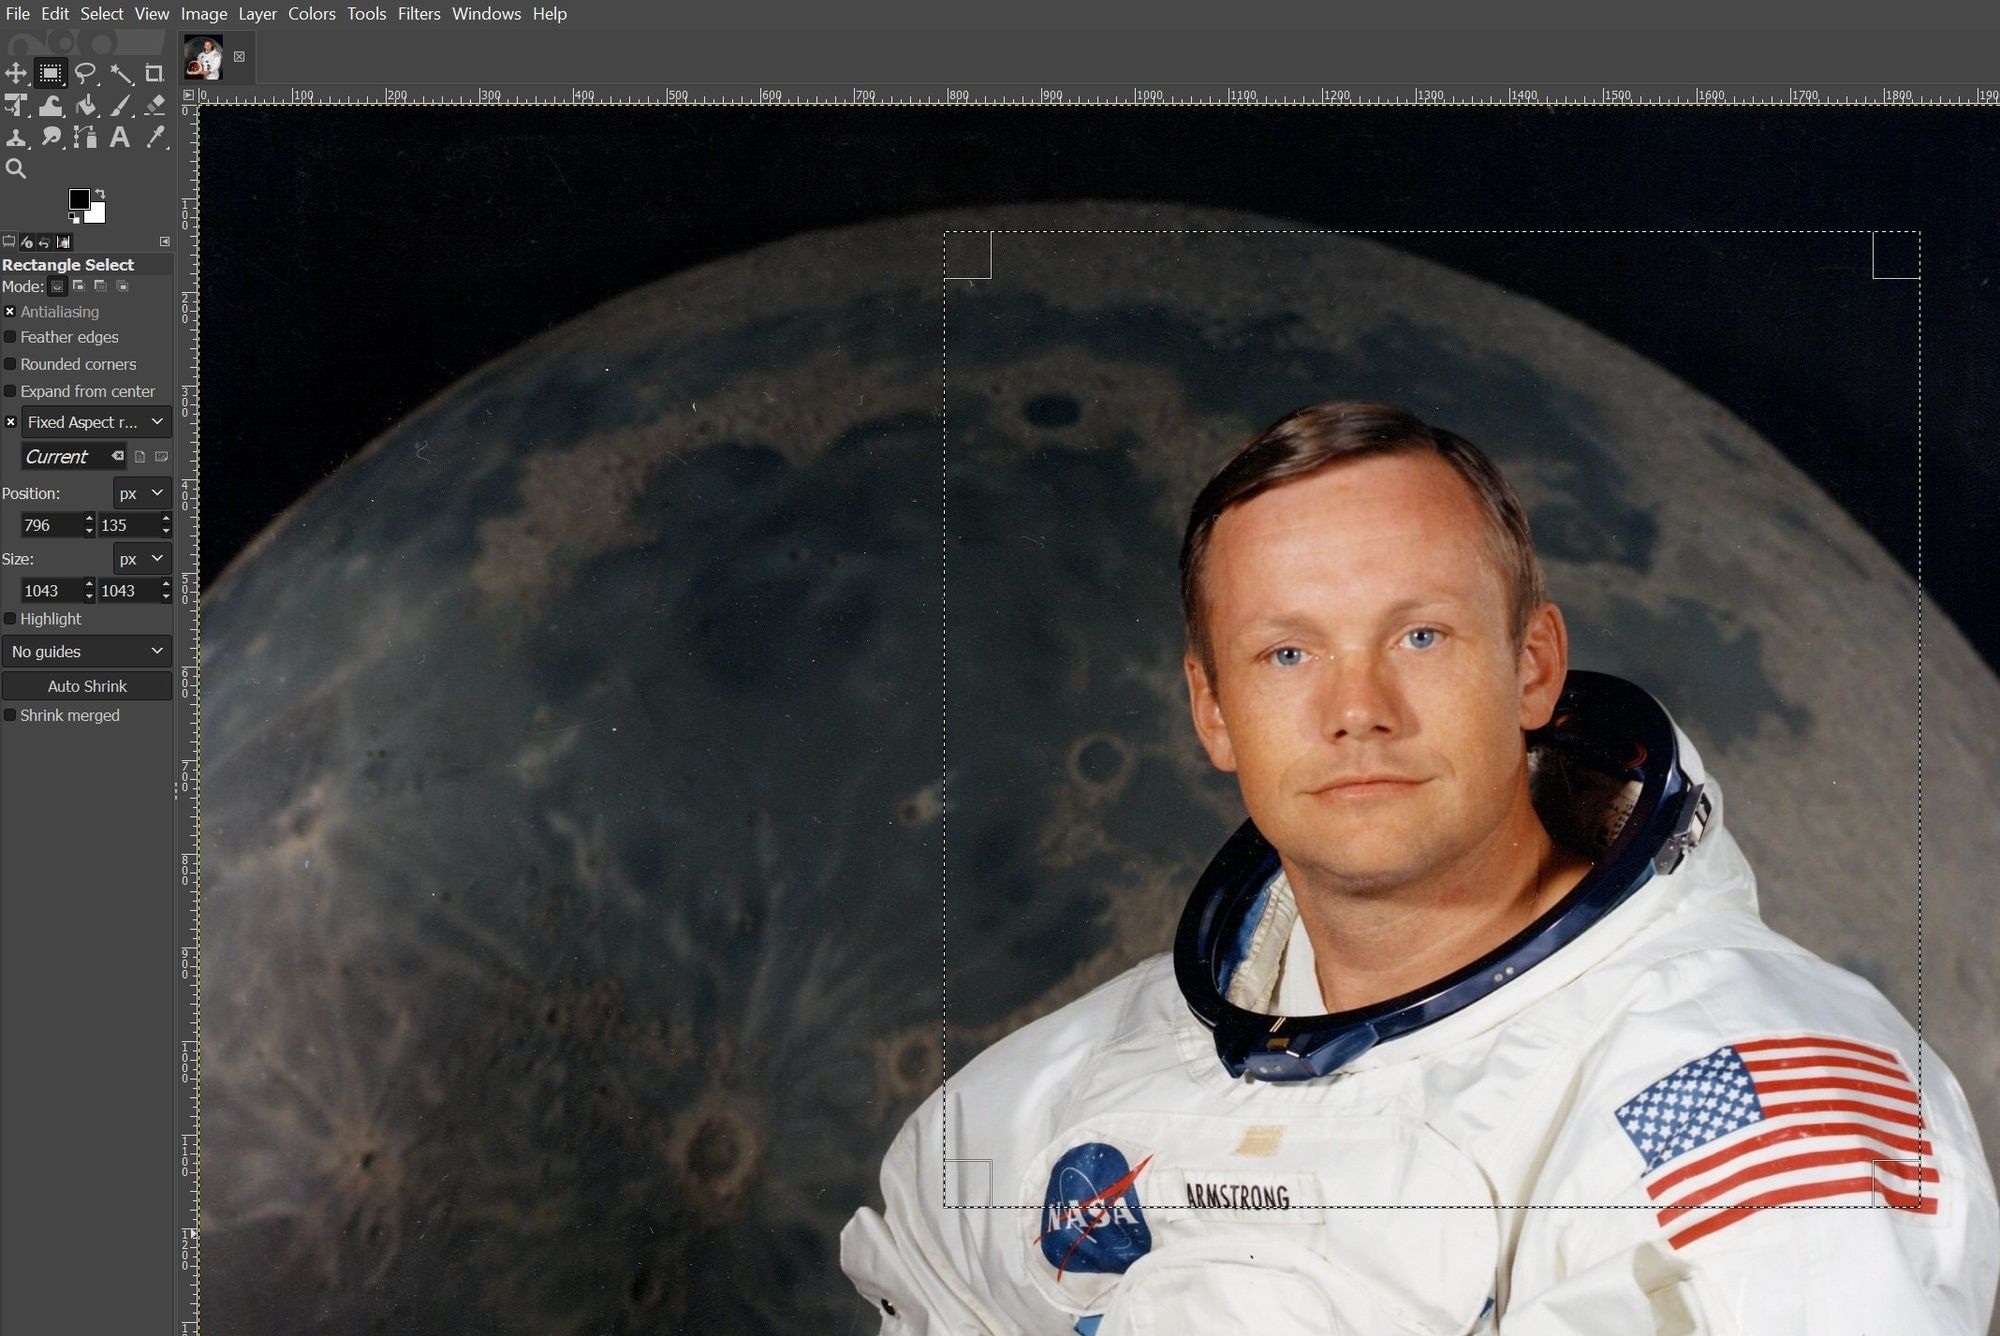
Rectange Select Toolfrom the toolbox on the left (the second icon) - In the tool options, check the
Fixedbox and make sure that theAspect Ratiois1:1. This will give us a square image. Check the screenshot below. Click and drag on the photo to select the area you want to use as your passport photo - Once you are happy with the selection, go to
Image->Crop to Selection. This will crop your image to the square.
Step 5 : Scaling the image
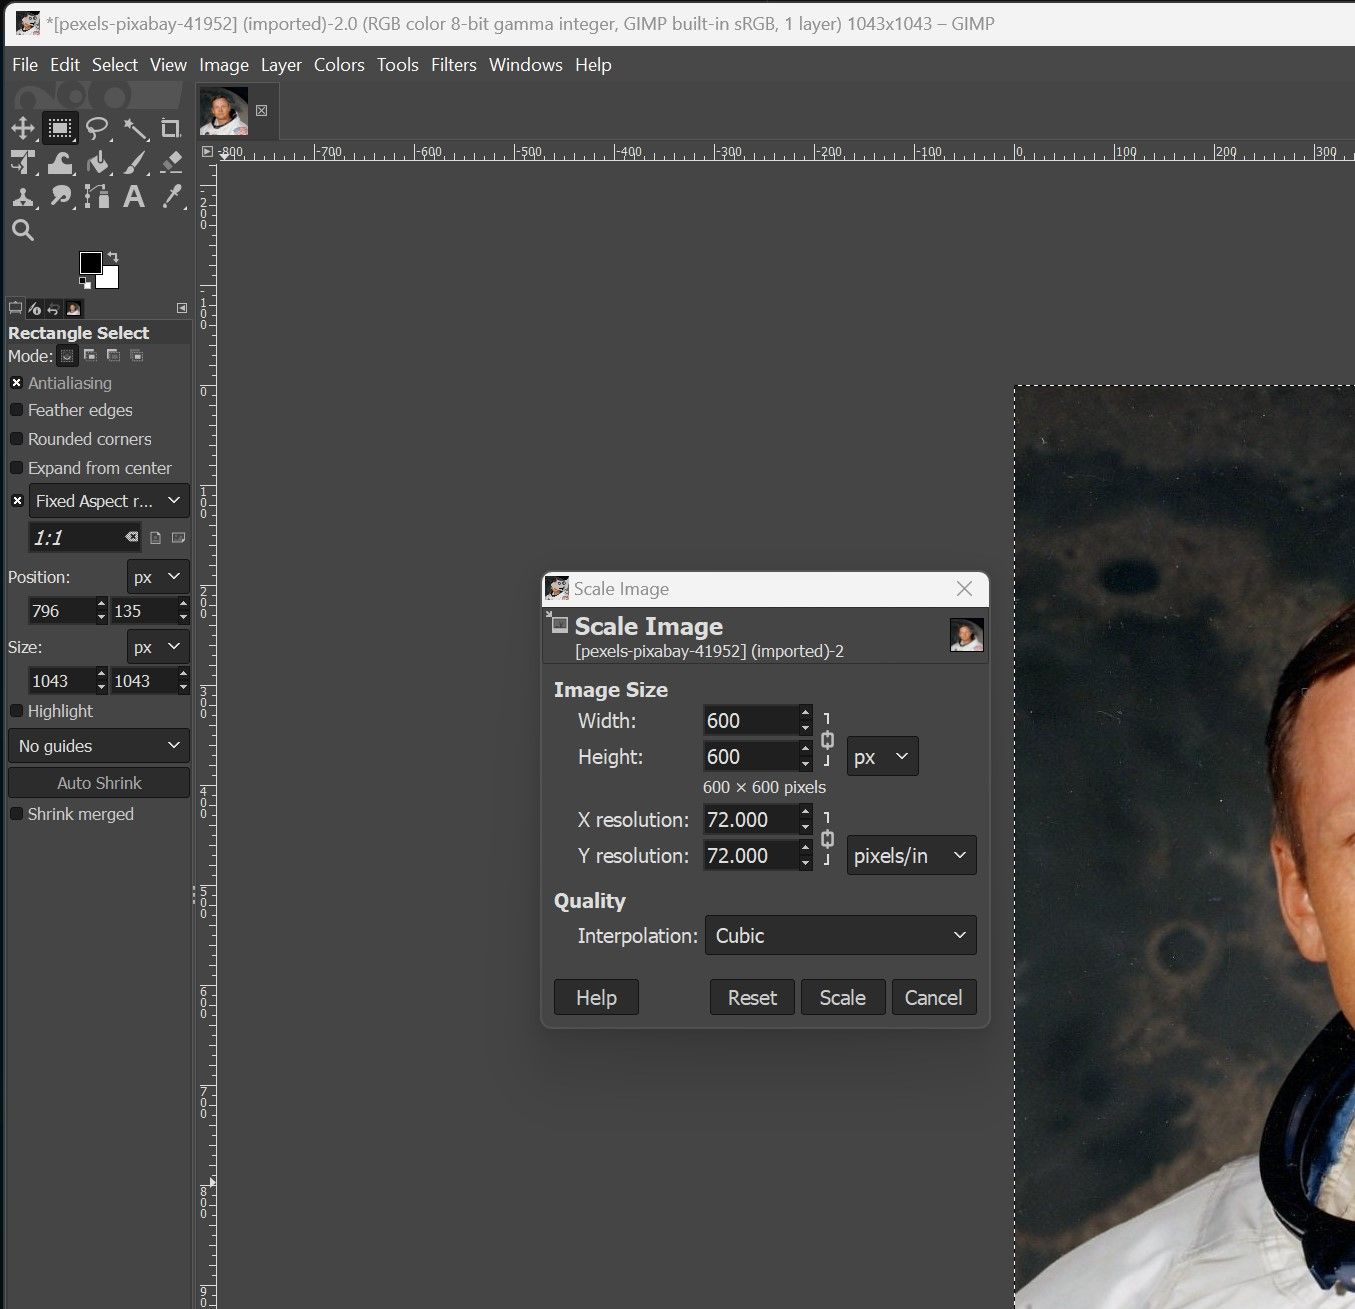
At this point we have a photograph that we can use, but the sizing may not me correct. We need to scale it properly. We will be using a 600x600 size for the image.
We need our output to be in 4x6 inches. At 300 pixels per inch, a 4×6 photo is 1200 x 1800 pixels.
- Go to
Image->Scale Image. Input600for both width and height, ensuring that the chain link icon is linked. This ensures that the image retains the aspect ratio. Otherwise you could have weird looking photo. ClickScale
Step 6 : Creating the 4x6 Photo Grid
Now that you have your passport photo ready, you can create the photo grid.
- Go to
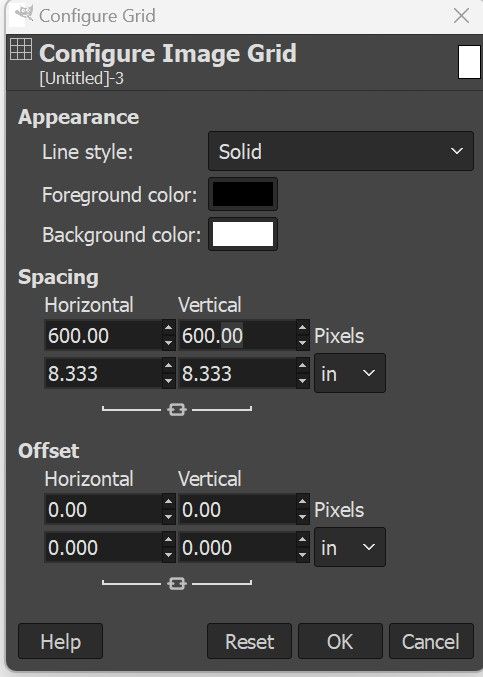
File->New. Set the image size to1200x1800pixels - Now we need to setup a grid of 600 pixel, which will give us 6 photos in a paper
Image->Configure Grid. In the spacing section, set the width and height to600pixels, clickOK
- Show the grid by going to
View->Show Grid. Now you will be able to see the 6 grids where we will be placing our photograph to. - Enable Snap to Grid.
View->Snap to Grid, this will make it easier to "snap" the edge of the passport photo to each grid - Go back to your passport photograph tab in Gimp and
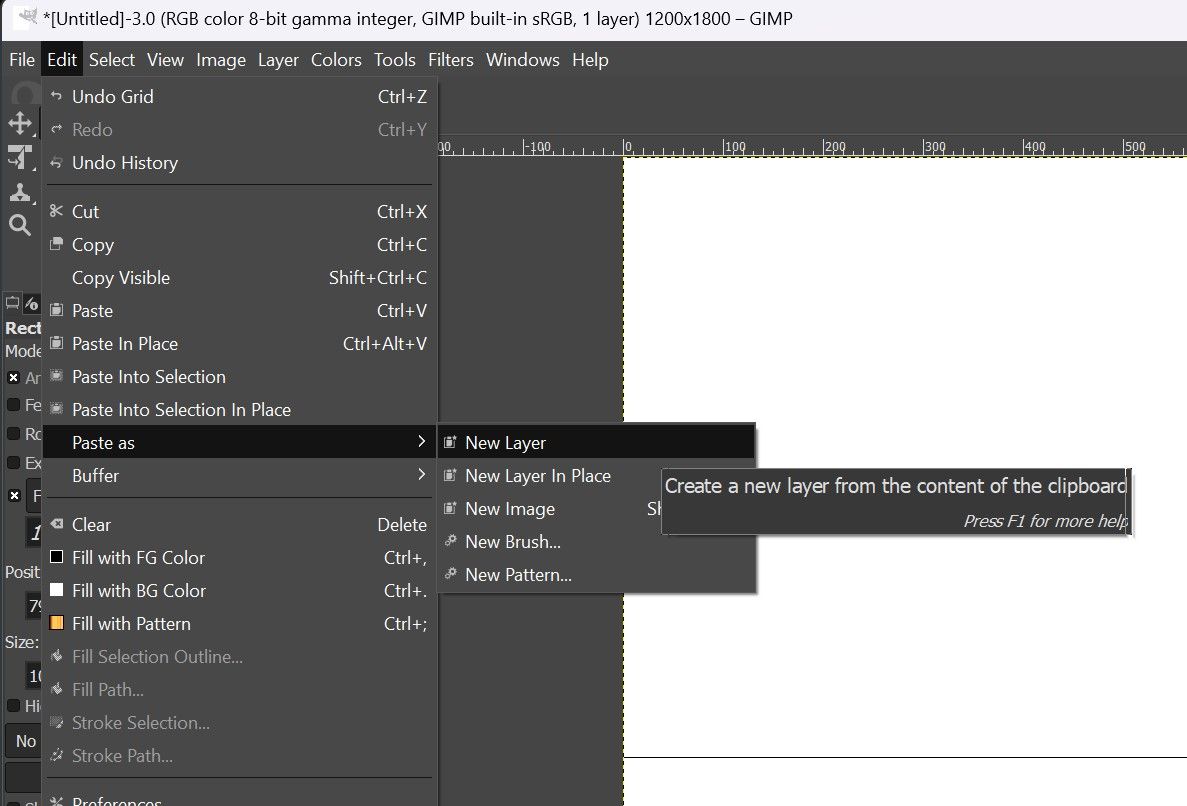
Edit->Copy - Now back in the 4x6 grid tab in gimp,
Edit->Paste as->New Layer. This will paste your passport photo as a new layer in your 4x6 grid
- Now, you can use
Movetool (the first one with 4 arrows) to move your image to one of the grid (maybe the first one?) - Create a new copy using
Layer->Duplicate Layeron your passport photo. This will create a new layer, which you can use theMovetool to move to another grid. Repeat this until you have filled all the 6 grids
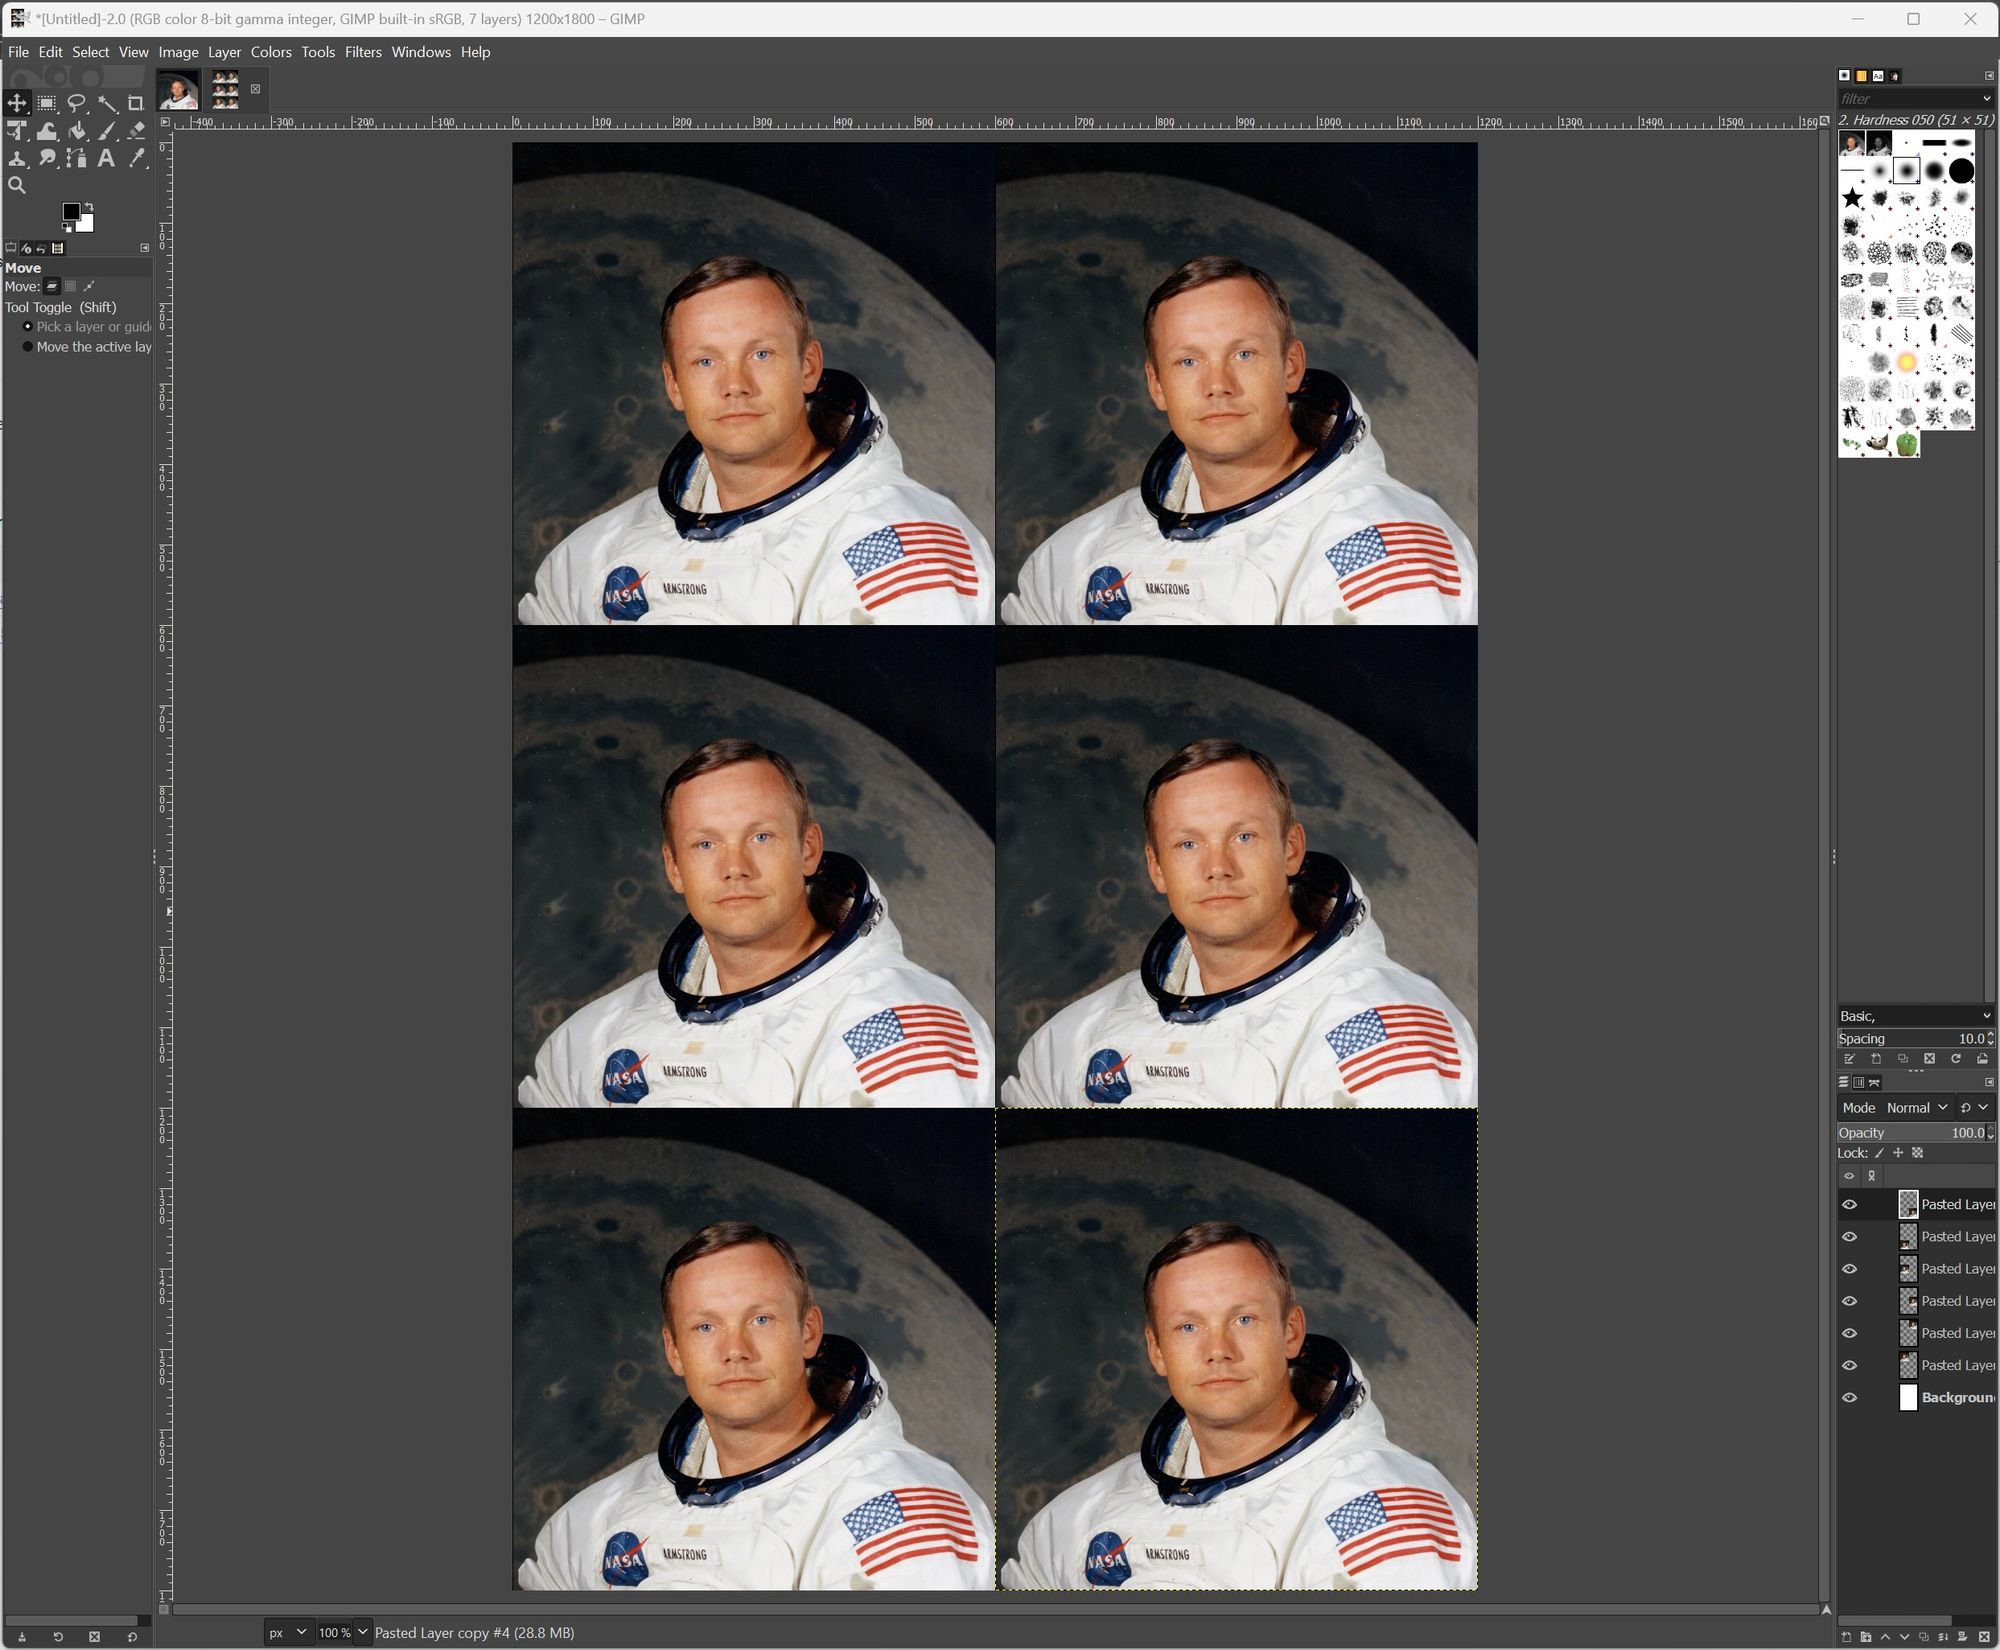
So it should look like this after you have filled the grids
Step 7 : Final Step : Export the image
At this point we are ready to export our final grid image
File -> Export As This will open a dialog box where you can enter a file name, enter a file name, and the format of the file will depend on the extension you choose, you can choose .jpg to create a jpg file, save it to an appropriate location, and you have your 4x6 passport photo grid, ready to print