How to Turn Off Your Laptop Screen Without Closing the Lid on Windows 11
Introduction:
If you're using a laptop with an external monitor, there may be times when you want to turn off your laptop screen without closing the lid. This can be particularly useful for gaming laptops that draw air through the keyboard, as closing the lid can lead to overheating. In Windows 11, the setting to disable a display may not be immediately obvious, but it's actually quite simple to do. In this blog post, we'll walk you through the process step by step.
Disabling a screen
Step-by-Step Guide to Disabling a Screen on Windows 11:
- Access Display Settings: First, go to your settings by right-clicking on your desktop and selecting 'Display settings,' or search for 'Display settings' in the Start menu.
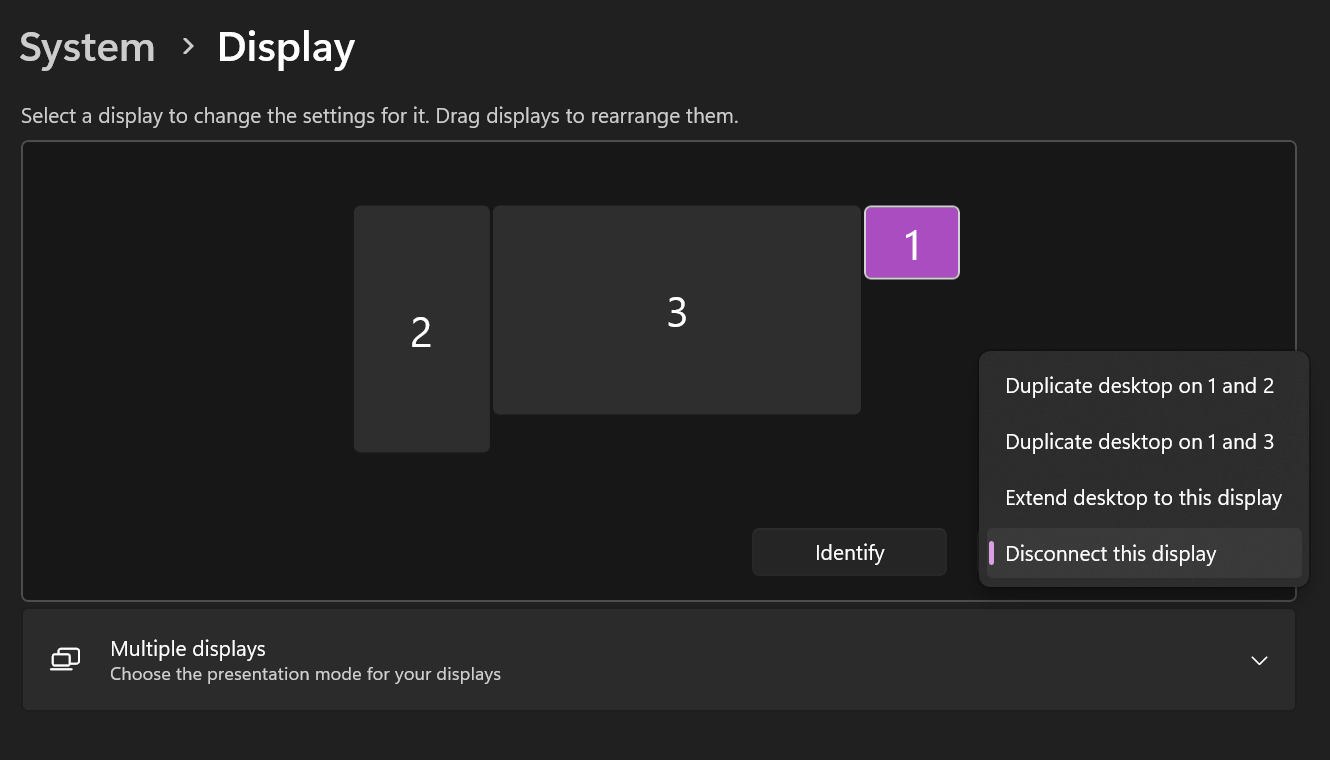
- Identify Your Monitors: Once you're in the Display settings, you'll see a visual representation of your connected monitors. In this example, we have three monitors: 1 is the laptop screen, and 2 and 3 are external monitors.
- Set Another Monitor as the Main Display: Before disabling your laptop screen, you need to set one of the external monitors as your main display. To do this, click on the monitor you want to set as the main display (in this example, we're choosing monitor 3). Scroll down to the 'Multiple displays' section and check the box next to 'Make this my main display.'
- Disconnect the Laptop Screen: Now that you have another monitor set as the main display, go back to the laptop screen (monitor 1 in our example). Click on the drop-down menu under the 'Multiple displays' section and choose 'Disconnect this display.' This will disable your laptop screen without requiring you to close the lid.
That's it